top of page

Rough map layout design:
Rough map design time lapse link >>> click here
From making a rough design of a map, the textures and
models of the walls, doors and floors were useful. First one
being the wall design where the door goes which allows
to make the door that came with it fit perfectly. The design
of the wall where the door fits is a Sci-fi themed design
which fits to the genre I would like to create.
My next part I used for my rough testing was the wall that
comes with the door and wall fitment for the door. I also
used a specific texture which was a Sci-fi texture which
adds to the genre. Testing this allowed me to also mess
around with the colour of the textures to possibly add it
to my main game.
These two textures are both sci-fi textures that
helped me produce a rough design of my map.
Reason why I chosen these two assets is because,
I was limited by the choices I could choose as
I needed free ones. These two manages to tick my
boxes of what I'm looking for by creating a sci-fi
feel of the game.
Blender designs >>>
Blender object 1:
My first Blender creation is an object that I created that was
used for for visual representation. It is a vehicle that I
borrowed ideas from a film called "Deadpool" of the prison
bus but turning it more of an nuclear barrel container carrier.
Creating this object allowed me to slowly progress to the
style I would like to create for my game which is a Sci-fi theme.
Blender object 2:
My second Blender creation is a camera object that is also
used for visual representation however, it has a role by showing
a red light onto the surface to indicate where you can cannot
walk into it otherwise the AI will be activated and will start to
chase you down. Creating this object allowed me to advance my
programming skills by creating triggers for an AI.
Blender object 3:
My third Blender creation is a key-card that is used for
opening up the locked door with additional trigger colliders
in order for it to be openable. Creating an object like this
allows myself to be creative when creating small interactive
objects.
Blender object 4:
My fourth Blender creation is a simple button creation
which was only used as aesthetics as the button never did
anything except to act as a "button" however, once the
player walks into the collider, it will switch off whatever
it needs to be switched off.
Blender object 5:
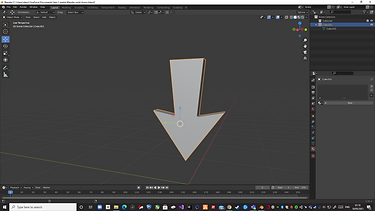
My fifth Blender creation is an arrow which was used
to help guide the player to switch off certain sections
such as the laser doors and the crane. Small detail
like this allows to make the gameplay feel more alive.
Blender object 6:
My sixth Blender creation is a charging port for the AI
which was used whenever the player gets to close
by a certain radius, the AI that was "charging" will
attack the player. Again simple idea but affective.
Blender object 7:
My seventh Blender creation was to make the player
and AI to brake into smaller pieces when destroyed.
Blender allows me to import the AI or Player model
and then adjustment can be made such as creating
a broken model of the AI or Player. This makes it
fascinating and makes the game feel more alive.
Blender object 8:
My eighth Blender object is a pump mechanism
for visual purposes to make the environment feel
more alive with additional animation.
Blender object 9:
My ninth Blender object is my middle section of the
game with a huge pump mechanism which is used to
move from site to site sections of the game.
Blender object 10:
My tenth Blender object is a crane that plays an
important role when destroying the AI. This object
was used to get deactivated by the switch will
switch off the lasers magnetic to drop whatever
it was holding allowing to destroy the AI that
was underneath.
.png)
.png)
.png)
.png)
.png)
.png)
.png)
.png)
.png)
.png)
.png)
.png)
.png)
.png)
.png)
.png)
.png)
.png)
.png)
.png)
.png)
.png)
.png)
.png)
.png)
.png)
.png)
_edited.jpg)
.png)
.png)
.png)
.png)
.png)
.png)
.png)
.png)
.png)
.png)
Player and AI mechanism:
Player movement animation and controls:
Player movement control test link >>> click here
The process consists of a downloaded asset that Unity
themselves provide which is called "Standard assets".
Standard assets provide a wide range of mechanism
to help you get started of whatever you want to create
for instance with me I needed a third person player
mechanism in which this asset provides for me. The
player controls for the third person mechanism consist
of many ways on developing and enhancing the players
movements, animation and even appearance. For this
example it is me player testing with my own animations
that I've downloaded from Mixamo which is a website
that has a range of animations and character designs.
Going into the animations tab of the player character in
Unity, I am able to change certain animations to my liking
for instance the Players running.
Player jumping on platforms link >>> click here
This video shows how using the the jump button makes the
player change animations to its jumping animation allowing
the player to jump to another platform. Same process to
what I was explaining previously that the animation
can be switched to my very own animation of my
liking.
Script:
Player being chased by an AI:
Player being chased by an AI link >>> click here
The AI has a downloaded skin that I've attached to the AI
from the asset store. This model makes it look more of a
Sci-fi feel of the game as its targeting more on robots
which same applies to the player model which is a robot
also. The AI it self has being programmed to chase down
the player and where ever the player is, the AI will
still run towards the player. The animation which I decided
to go with is an pumping animation when ever the AI is
close enough to the player to trigger the punch animation.
Script:
Player camera perspective (Top down view):
Player camera top down view link >>> click here
The top down camera view is an essential part for
the type of creation of a game I wanted to create.
Using this camera allows me to position it
how I want it to be for instance for me I needed
it to be a top down view. The scripting for this
camera function allows me to do many adjustments.
The camera can also follow wherever the play goes.
Script:
AI punching the player and once colliding the fist to the player, the player will play a death animation:
Player being punched and disappearing link >>> click here
For this part of the process I attached a specific collider
that has been tagged as "RobotFist" as in the attack
player script, whatever collider is tagged as "RobotFist"
will make an object disappear if the object for instance
the player is tagged as "Player" it will delete the object from
the scene.
Player fractured animation that was done in blender >>> click here
The whole fracturing a model was made in Blender
where you can create a model into pieces with
a few steps in which in Unity it will just fall and crumble
into pieces.
Player death animation once collided with the collider from the AI punch link >>> click here
For this process I have combined both the disappearance of the
player upon entering the collider and also spawning the broken
version of the player model with a "CreateObject" mechanism
collider which whenever the player enters the collider, it will
spawn the specific object that I've made sure it spawns in this
case a broken model of the player.
Change of plans animation colliding with player:
Player being destroyed by AI running straight at the player >>> click here
From doing some adjustments, I've decided to make
the AI charge at the player whilst the head is the main
part of the AI's body that will destroy the player.
Reason why I went for this is because, the punch
delays which results the AI to have a hard time to destroy
the player.
Player particle effect when fractured into pieces:
Particle effect when fractured into pieces >>> click here
For this particle effect, it is an asset that I downloaded from
Unity asset store which helps give it that exploded effect.
I also added additional sound effect for when the player
explodes it will also play the sound.
Script for creating object such as the explosion:
Script for activating sound effects:
AI detection system from its line of sight and changing animation to its running attack state:
>>> click here
AI will start to run when the player enters a certain
radius of the AI which will charge at the player. The
mechanism for this makes sure that when the player
enters the radius of when the AI will follow the player,
it will change to a attack state animation.
AI patrol:
First attempt with the AI patrol system >>> click here
For my first attempt with the patrol mechanism,
the AI would still go towards the waypoints however,
the AI would instead run towards the waypoints and would
stop animating once reached to the certain waypoint.
Second attempt with the AI patrol system >>> click here
For my second attempt, the AI is now only walking towards
the waypoints unless if the player is close, it will go into
attack mode and once the AI destroys the player, the scene
will reset because, the player entered a collider which triggers
the countdown of the reset scene.
Scene reset script:
AI patrol script:
Game Over/ You Died screen:
Player entering collider of a death screen/ game over:
First attempt on seeing how it functions >>> click here
In this first attempt, I test a simple mechanism where
if the player collides into a specific collider, a text will
appear in front of the players screen and as of now,
it appears as "Test". This is to just indicate if what I
did was correct to make it appear and then I can
develop it further to my liking. I used a simple
"Create Object" script for a collider in which
as soon as the player collides with it, a certain
"Object" will appear which in this case it is the text.
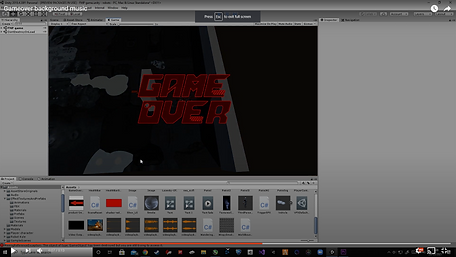
Second attempt by getting the game over screen with voice sound with fade screen and text >>> click here
For my second attempt of my game over screen
I've added a text fade animation for my game over
text with an additional black screen fade in to cover
the background. The text has been re designed to a
red font to give it that game over effect. I've also
added a game over robotic voice to make it more
detailed. The voice is added to the canvas of the
game over screen which will play with the text.
Third attempt by getting the game over screen with voice sound with fade screen and text with music >>> click here
Nothing much has changed from my previous test
except I've added an additional background game over
music to improve the feel of loosing. Same thing how
the voice over works but with music.
Script upon colliding:
.png)
.png)
.png)
.png)
.png)
Reset map trigger when player character dies:
Player colliding with the enemy collider which triggers an invisible countdown of when the map resets which can be adjusted:
Testing on how it works >>> click here
My first test attempt I got the reset scene mechanism
to function correctly where you wont see the timer,
however it will reset the scene eventually depending on
the timer I've set. This is done when the player enters
the collider which will trigger the countdown of the
reset scene.
Improved version >>> click here
(Improved version is by having a slight black screen which shows a game over)
The improved version is by having a slight black
screen in order to hide the game but make sure
the player looks more at the game over screen.
Reset scene script:
.png)
.png)
.png)
Player dies and resets map when colliding with the laser gates:
Player colliding with the laser gates resulting the player to destroy and respawns within a few seconds:
Testing turning the laser gates off >>> click here
The process of this to function is by adding
a destroy object tag which is a collider
on the button that is parented with the laser.
Once the player enters the collider, it will
destroy the laser object. resulting in "switching
off" the laser.
Testing colliding into the laser gates >>> click here
When colliding into the laser, same process
with the AI function when the player gets destroyed
which shows the broken pieces of the player with
the game over screen resulting in also restarting
the scene.
Same script used for the AI mechanism however, I moved it to the laser.
.png)
.png)
Animating arrow:
The arrows will show the player where the button is and once the button is pressed, the arrow disappears:
Test animation >>> click here
For the test animation, I made sure the arrow animates
with a forwards and back motion to make it have that
extra detail in the animate section. This is so that it can help
indicate the player where you'll need to go and do.
Improved version of the arrow animation >>> click here
The improved version of the arrow animation makes sure
the arrow animates more smoothly and when colliding
into the collider of the button, it will destroy the arrow
and the laser in order to indicate it has been deactivated.
The collider is parented with the laser and arrow which has
a "destruc" tag.
.png)
.png)
Laser door switch off and active sound effect:
Player collides into the button which switches off the laser doors and the laser doors will activate a power down sound effect however, the laser door will also have an activate sound effect:
How it works for turning the laser off sound effect >>> click here
When the player collides into the button collider, there is also a
SFX trigger collider where when the player enters the collider
it will activate the SFX. This is why you'll hear the power off
SFX allowing to make the laser sound more alive.
Laser sound effect when active >>> click here
The other SFX is a 3D sound in which you'll hear a 3D
sound through your headphones which will sound
like what you'll hear in real life. Once the laser is
destroyed, the sound effect gets destroyed.
SFX sound effect script:
.png)
.png)
.png)
.png)
Door animation trigger:
Testing on creating an automatic door (many issues were encountered) >>> click here
For the first test of this process I tested out a certain
script for opening a door automatically upon colliding
with the trigger. The animation of the door is very fast but
works as it should.
Updated and polished up automatic doors without bugging out in different positions and location >>> click here
The updated version of the automatic door has an updated
script which allows it to rotate and position the door at a
different location without bugging out. The door animation
improved with a smooth animation in the animate section.
Door script:
.png)
.png)
.png)
.png)
Key card animation/ pickup and opening the locked door:
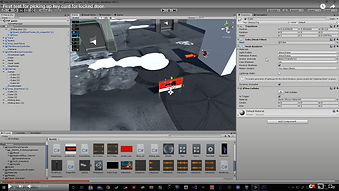
First test for when the player picks up the key card in which destroys the locked door >>> click here
The first attempt in which the player will be able to pick
up the key card will also destroy the locked door which
doesn't animate. The whole process happens when the
player collides into the "DestrucTrig" which will destroy both
the key card and the locked door as the door is parented
with the key card.
The proper polished up version makes it so that when the player walks into the key card, it will spawn the automatic door and replace the locked door >>> click here
The updated version is a more polished version where
the key card has an additional "CreateObject" script where
it will spawn an automatic door when the player enters the
collider.
Same scripts used for the previous examples:
.png)
.png)
.png)
Player entering the collider which makes the AI that was idle to chase the player:
The first test shows what happens when the player enters the collider >>> click here
This is another "CreateObject script where it will also
destroy the AI idle model and once entered the collider,
it will spawn an AI that will attack the player.
The second attempt shows how the AI changes from having an idle animation to then in attack form>>> click here
This is just another angle of what it looks like
when the player enters the collider in which
the idle goes from idle to attack mode.
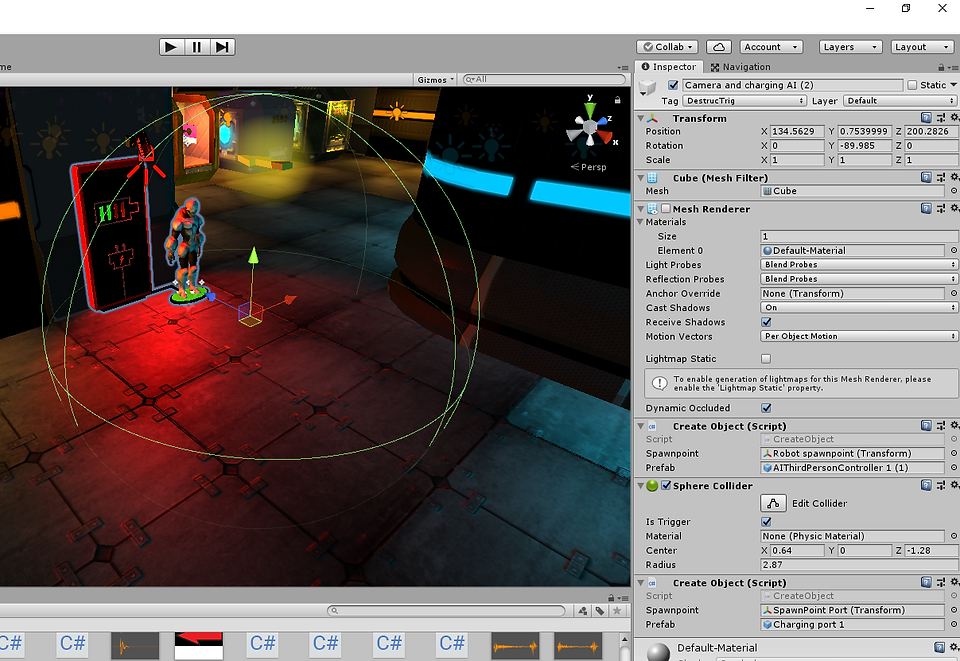
The third attempt is a more refined and finished version of a charging port, particle animation and camera with a red light to indicate a trigger for if the player enters it, they are in for a surprise >>> click here
The improved version consists of an object I've
made in Blender with additional particle effects
which also consists of the camera I've created in
Blender also. The red light is also shown to indicate
where you should enter as I've added a cylinder
collider in which the AI will attack the player. There
is also a "CreateObject" when entering the collider
which will make the charging port to turn white
when the AI stops charging.
Same principle with the other lot which consists of a create object script:
.png)
.png)
.png)
.png)
Activating traps to drop an object on top of an AI:
First attempt for an object falling on top of an AI >>> click here
First attempt shows how the object is tagged as player
in which the AI is tagged as "DestrucTrig" which will
make the AI deleted its as simple as that.
Finished and refined version of an object falling on top of an AI >>> click here
The finished version consists of a crane that I've created in
Blender. The crane also has a magnetic field that is "switched on"
but in reality I added an invisible box collider underneath the
object which is parented to the button box collider. Once
the player enters the box collider of the button, it will
switch off the cranes magnet and will make the object
to fall onto the AI with an additional explosion and
broken pieces model.
Same principle with the other scripts, Once the player collides into the collider with a tag name "DestrucTrig" it will destroy the object and other objects that are parented with it:
.png)
.png)
.png)
Acid water effect:
Testing out it's animation and how it functions >>> click here
The acid water that I've downloaded from the Unity asset store
consists of many functions such as colours that I can mess around
with. This will allow me to produce an acid water type look
which in reality its just water that has been coloured.
.png)
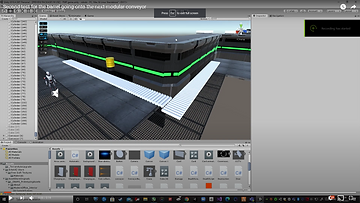
Modular conveyor belt:
Testing out it's animation and how it functions >>> click here
For my first attempt on creating a conveyor belt, the object
successfully moves across the platform without any problems.
This is done by applying the script to the object in which it
moves but you dot see it moving.
Second attempt >>> click here
For my second attempt I've created a function
where the object would change directions
because of how the conveyor is positioned
allowing to make the the object travel wherever.
Third attempt >>> click here
The second attempt I've created a looping design
in which the object would constantly loop around the
design of what I've created.
Conveyor belt script:
.png)
.png)
.png)
.png)
.png)
Pump animation:
Testing out it's animation and how it functions same principle to the arrow animation >>> click here
The pump use a simple animate section
where it would loop creating an illusion of
of the pumps pumping the water to the tube.
This gives it more appealing when playing the
game as small details like that makes the environment
feel more alive.
.png)
End screen:
How it looks when it goes back to the main menu screen >>> click here
The same principle on when the player dies and
gets a game over screen however, this time it will
show a "Test Completed" screen and a collider
which will send the player back to the Main Menu
with an invisible timer. I've also added a different
voice over this time same how it functions with
the game over screen.
Scene to Main Menu script:
.png)
.png)
Footstep SFX
How it works >>> click here
The footstep SFX I've downloaded from YouTube
and cut three pieces of footstep sound effects
in premier pro in order to have a continues change
when the player is running. Once that was completed
I drag it into Unity and I created a specific script for
the footstep mechanism with an additional
creating points for when the player models feet
touches the ground it will create a sound effect.
Script:
.png)
.png)
Main menu test
How it works >>> click here
The tutorial I followed gives me the basics of
what I need for my main menu such as the
Play button, options button with has a
fully functioning volume adjuster and quit
button. All of the buttons are fully functional
to what hey are supposed to do.
Animation >>> click here
The animated process I've made it look like as
if the area is actually in space making the objects
looking like they are floating across space. This is
a simple job as all I used to make this work is
called animate.
Finished Main menu >>> click here
The finished version of the main menu is filled
with detail consisting with refined text designs,
more objects floating around the screen, earth
changing from blue to green, particle effects
and an additional self created photoshop
image for controls section.
Main menu script:
.png)
.png)
.png)
.png)
Advice pop up:
How it works >>> click here
This process consist of the "Show_UI"
script in which I edited the player robot
in photoshop to be shown as the advice
speaker. The advice is also there to help the
player to have a better understanding on what
to do during the game.
Refined version on multiple advice >>> click here
The finished version of the advice section
shows how when entering a specific collider
the previous advice will be gone from the screen
and when entering a new advice the same process
happens with the whole pop up SFX.
Same scripts used for previous sections which
consists of a show_UI script.
.png)
.png)
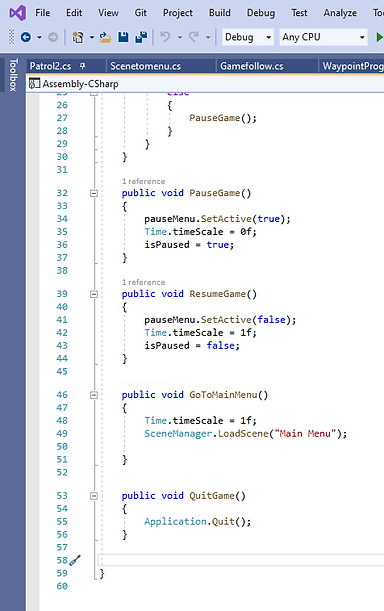
Pause Menu:
How it works test 1 >>> click here
The first test of the pause menu shows how
when the mouse cursor goes over the words,
it will be highlighted making sure it is clear
what you will be clicking on.
How it works test 2 >>> click here
For my second test, I've managed to create
the pause menu to make the game freeze once
pressed allowing to give the pause menu
its whole purpose when pausing a game.
How it works test 3 >>> click here
The finished version of my pause now can
go back to the main menu without any issues
and the main menu doesn't get affected by it.
The quit button on the pause menu also fully
functions which quits the whole game.
Pause menu script:
.png)
.png)
.png)
.png)
.png)
All of the assets that were used:
All of these assets are what helped me manage to create a game like this by making it sci-fi.
.png)
.png)
.png)
.png)
.png)
.png)
.png)
.png)
.png)
.png)
bottom of page